AutoCAD’s hatch tool allows you to fill objects or enclosed areas with a specific pattern, colour and/or texture. This feature is essential for identifying and customising specific objects and adding visual effects to your drawings.
What can take your drawings to the next level is modifying hatches to suit your unique requirements. AutoCAD makes it easy to manage hatch properties, create custom hatch patterns, hide and show hatches, apply hatches to open areas, and separate hatches in connected areas. Read on to find out how.
How to Use AutoCAD’s Hatch Tool
AutoCAD comes with a library of different types of pre-designed patterns that can be very useful. These can be found on the Draw tab, under the Circle icon, with a down-down menu showing the available options: Hatch, Gradient and Boundary.
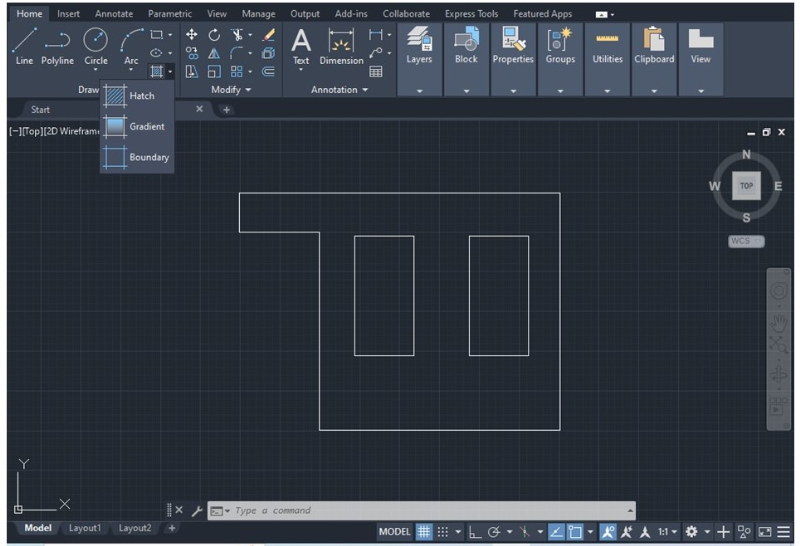
While this article will be focusing on using the Hatch tool, the Gradient tool is used to apply a solid fill to an object by filling the enclosed area with color, while the Boundary tool only changes the visual aspect of the object’s contour or perimeter.
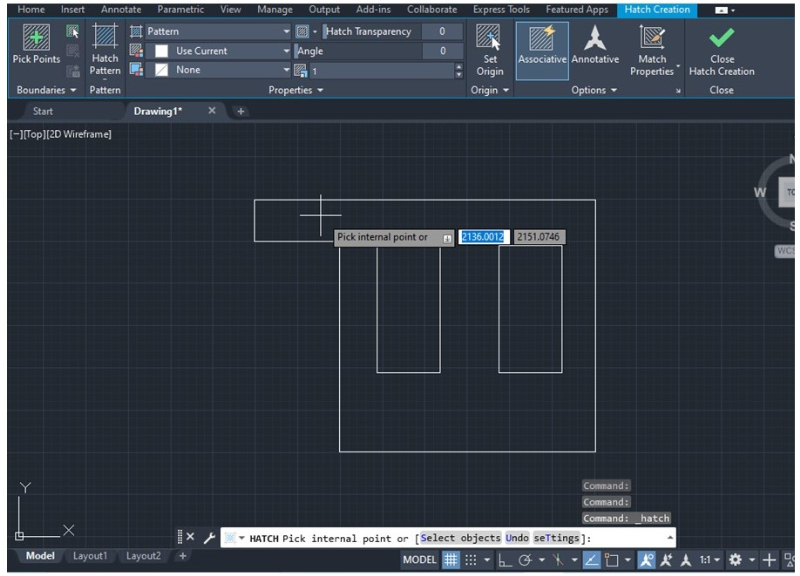
To apply a hatch to an object, select the Hatch option and a new set of tools will appear at the top of the screen that let you change or modify the hatch’s attributes depending on your needs. In this new menu, you can control hatch properties, patterns, and boundaries.
To learn about the basics of how to use AutoCAD, this article is a good reference.
Managing Hatch Properties in AutoCAD
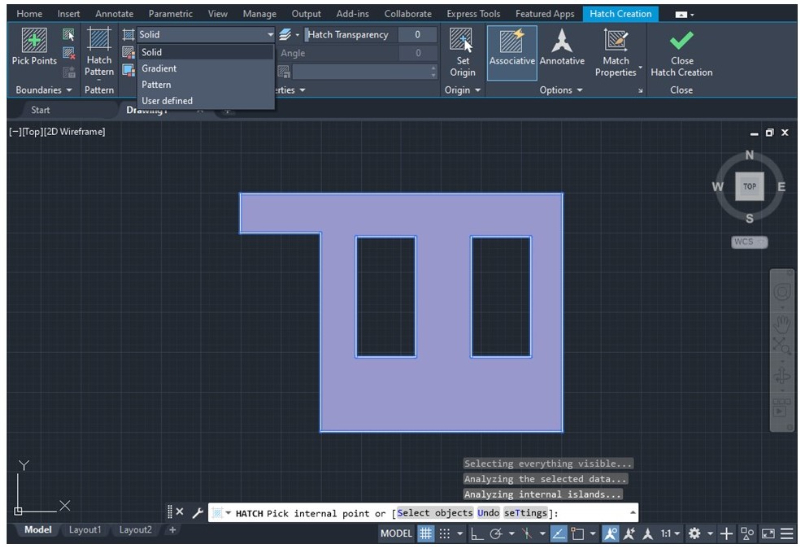
The hatch can be solid, gradient, pattern or user defined. If you choose one of the first three options, you can customise the colour using the AutoCAD colour palette.
You can also set the hatch by layers or blocks, which tends to make the design process easier.
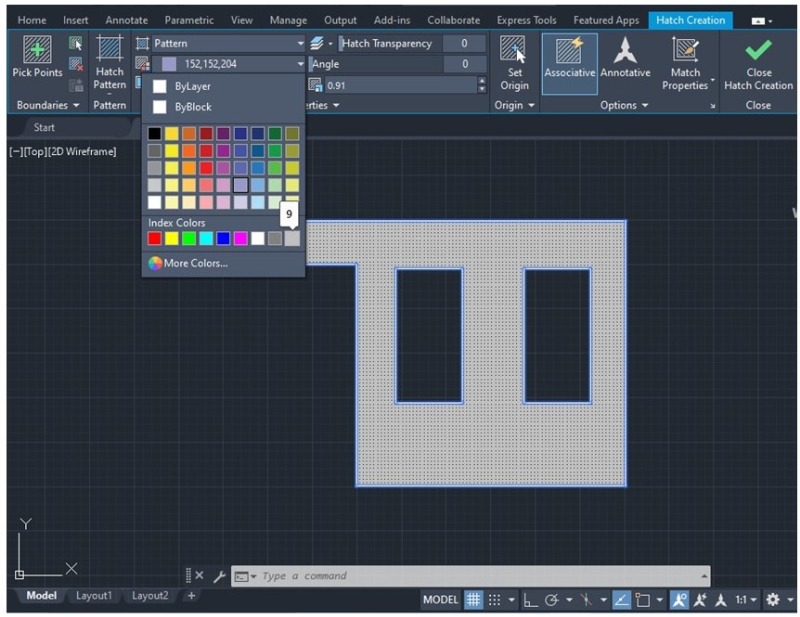
By clicking on the Hatch Pattern icon, you can choose from the twelve options provided by AutoCAD, but you can also create your own custom hatch patterns.
Creating Custom Hatch Patterns in AutoCAD
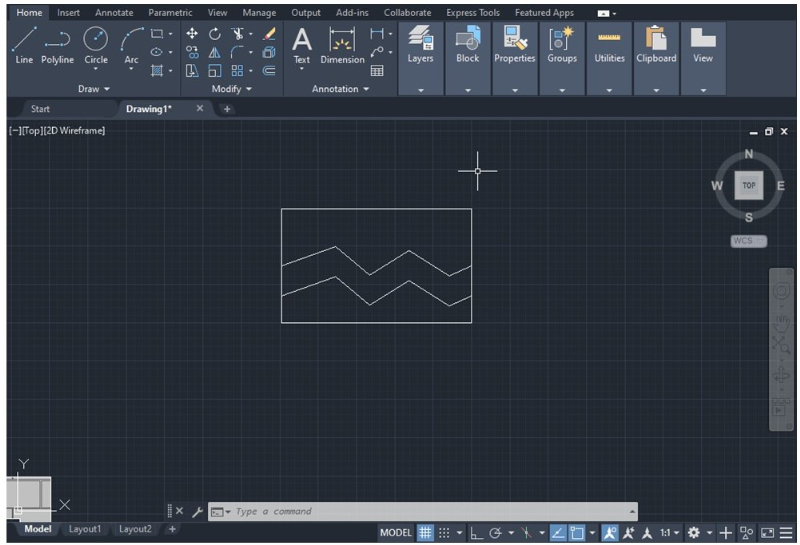
1. First, you need to create a pattern or object you want to use as a new hatch like the image below.
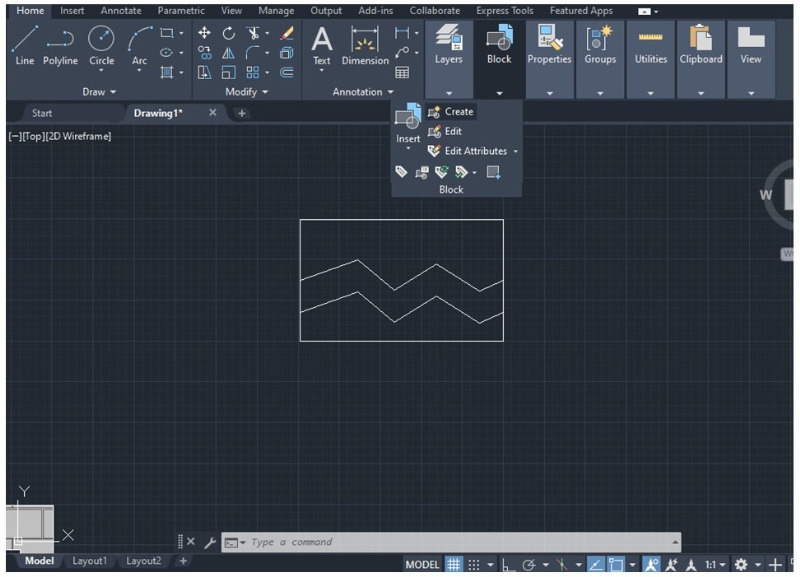
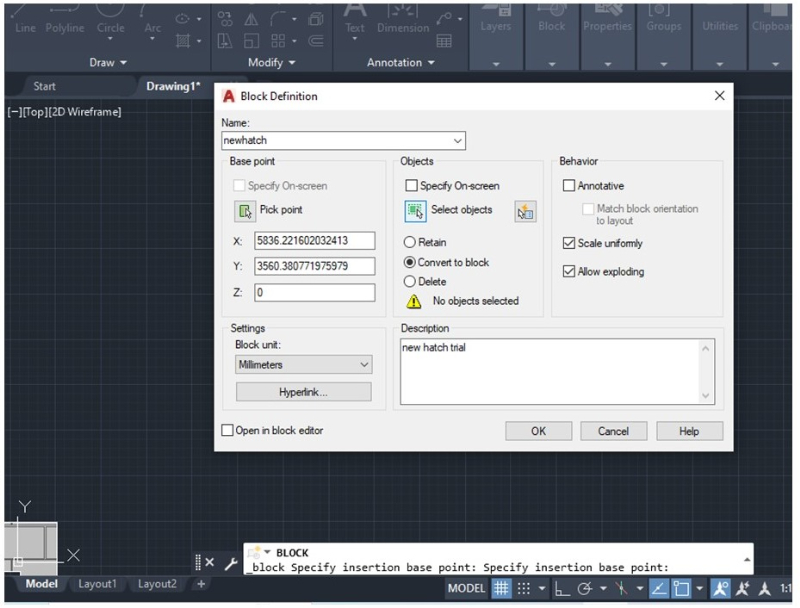
2. Next, create a new block for the object you created. For that, click the Block tab, and a drop-down menu will appear. Click on the Create icon.
3. After clicking the Create icon, a new window will pop up immediately. Type in the new block name and description, and make sure the “Allow exploding” and “Scale uniformly” options are selected.
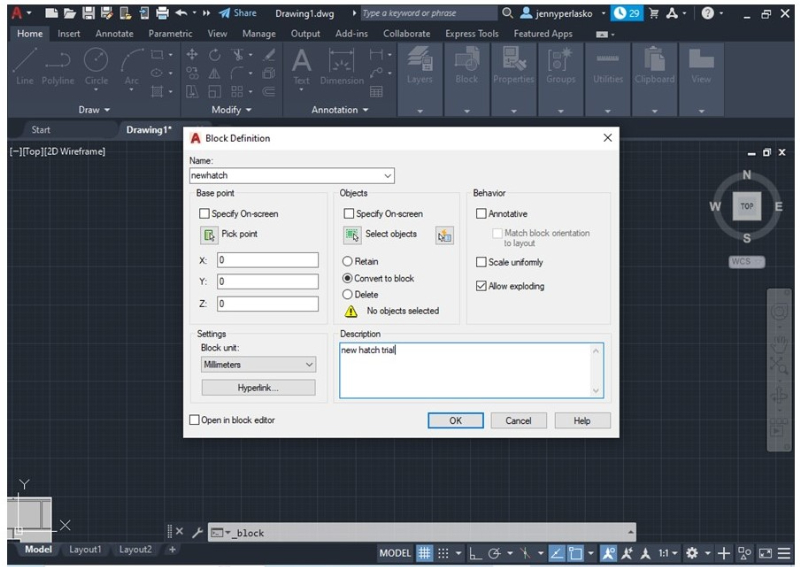
4. Then, click on “Pick point” and select the center of the desired object as shown in the picture below.

5. You will notice that the X and Y coordinates will change after the previous step. Now, click on “Select objects” and be sure to include all the object’s lines.
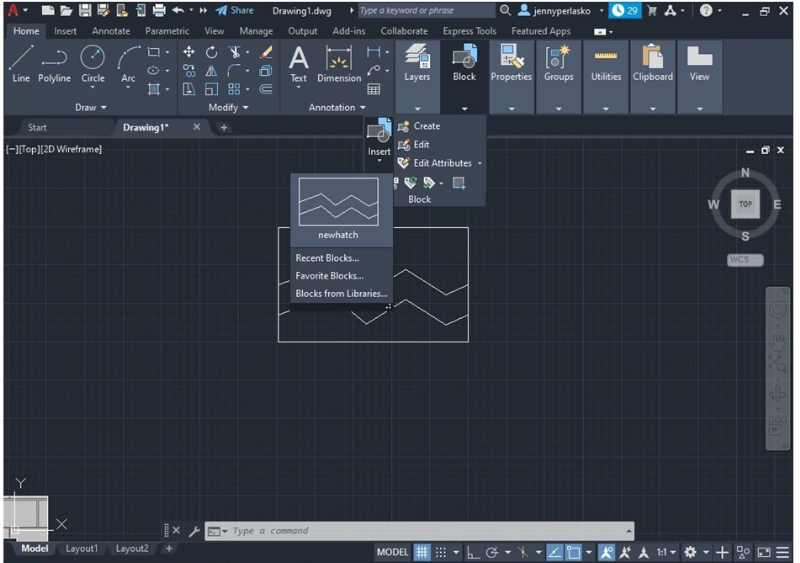
6. After selecting the objects, press Enter and then OK. The new block should now be created. To check, click on the Block tab and then on Insert. The block you have just created should appear as the first option.
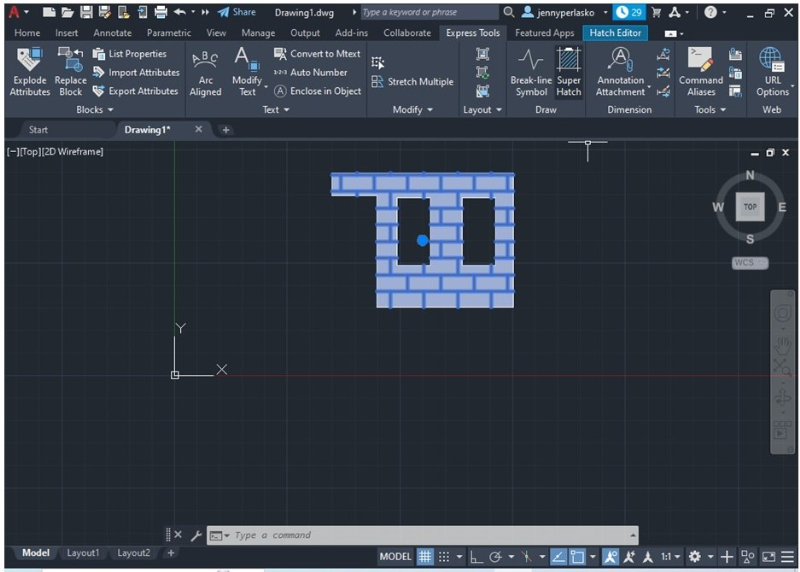
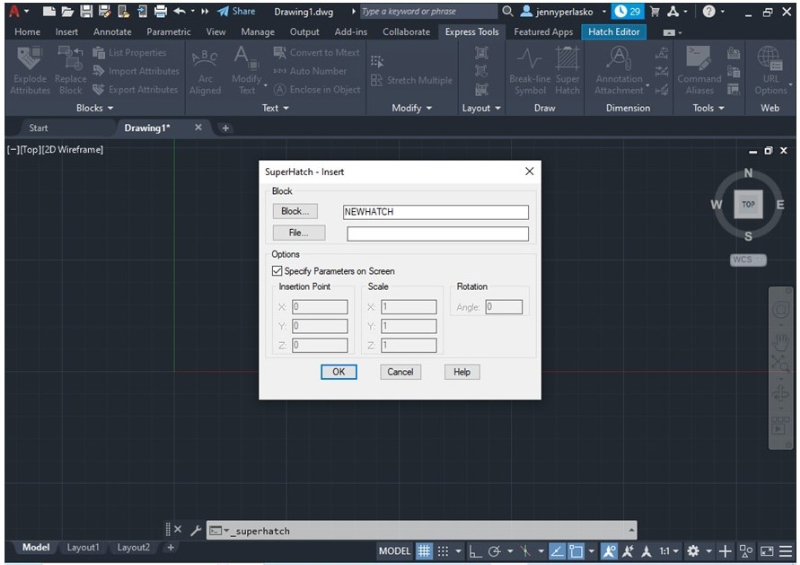
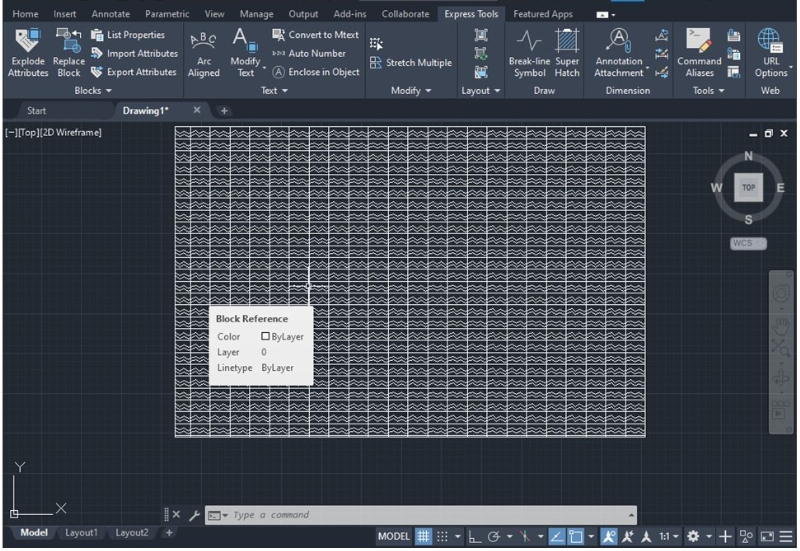
7. Click on the Express Tools tab and then on Super Hatch. A new window will pop up with the Super Hatch settings.
8. Choose the Block option to use the recently created pattern. However, you can also use an image from your desktop to create the hatch as well (using the Image option).
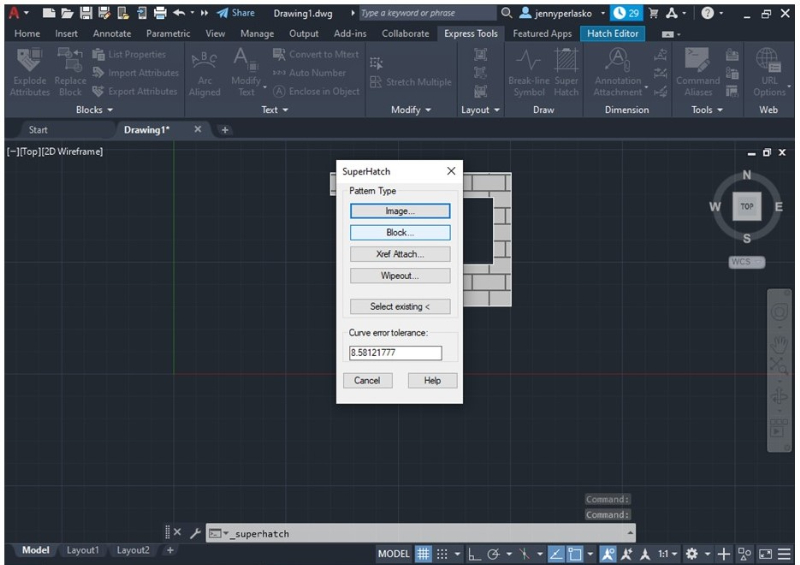
A new window will appear with the block name you entered as the default. Then click OK.
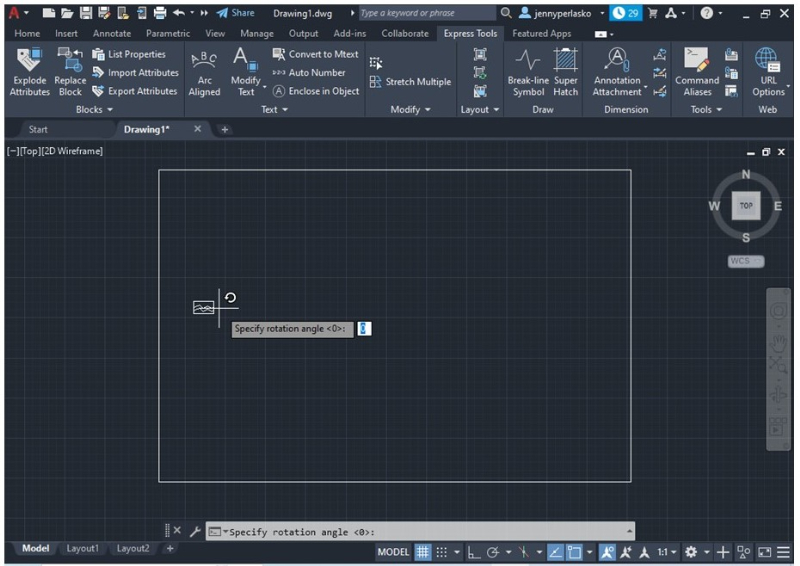
9. Now, select the scale for the pattern; type it in with the keyboard and press Enter. Next, indicate the angle of rotation within the enclosed figure and press Enter.
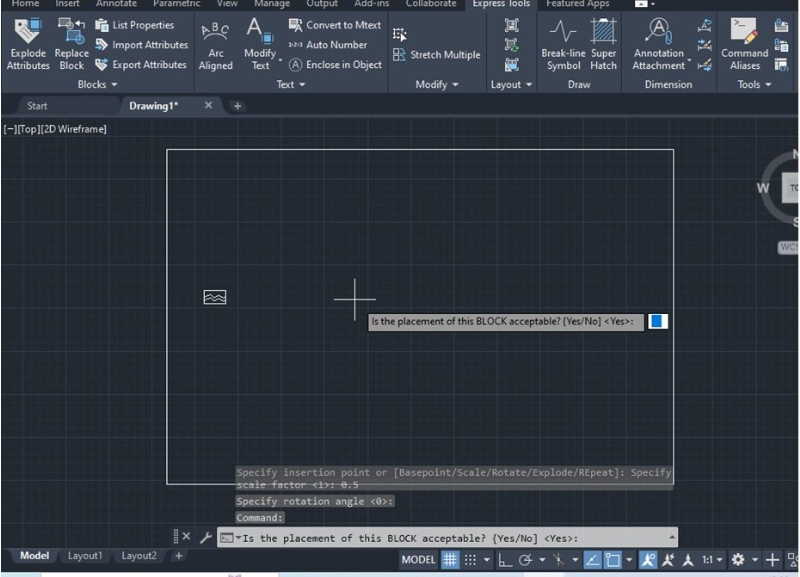
10. Confirm the hatch location by typing the word “Yes” as shown in the image below.
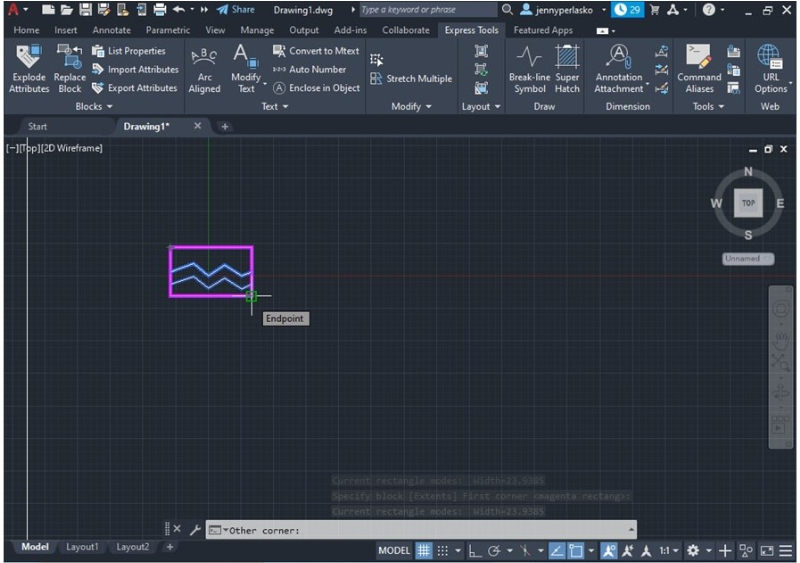
11. Select the external corners of the hatch to establish the repetition points for the hatch. Each corner you select will be the starting point and endpoint for the next pattern. Use the mouse to select the two corners and then press Enter.
12. Finally, select the enclosed area where you want to insert the hatch and press Enter.
Now the enclosed area should be filled with the new hatch, as shown in the image below.
You can play with the pattern repetition and its size by changing the scale and modifying the external corners to extend the distance between each pattern. However, you cannot modify the original pattern (saved as a block). You have to create a new block to change the pattern by repeating the process outlined above.
For those who also want to know more about AutoCAD layouts, here is an article that will help you.
Hiding and Showing Hatches in AutoCAD
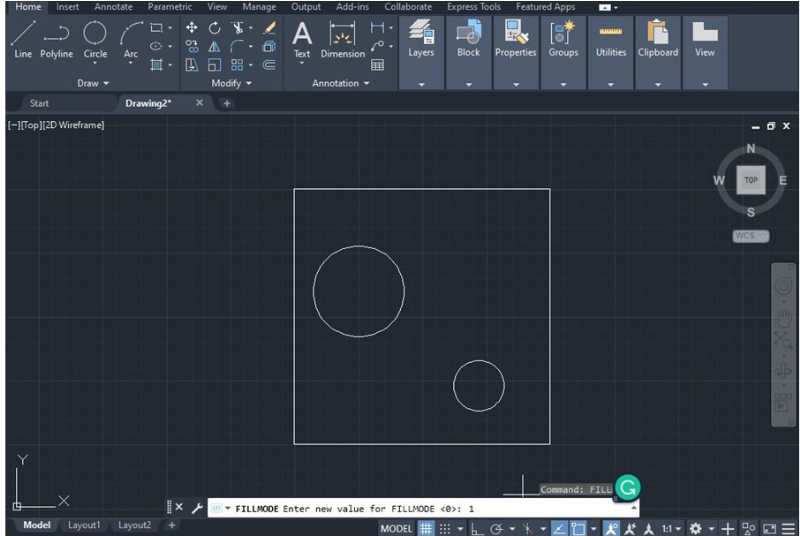
Sometimes, you may want to hide or show certain hatches in the drawing, especially when working with multiple layers. Fortunately, it’s possible to hide them or show them with one simple command: FILLMODE.
To hide hatches, type the word FILLMODE in the command bar and press Enter. AutoCAD will ask you to enter a value (0 or 1). Choosing “0” will hide the hatches and “1” will make them visible.
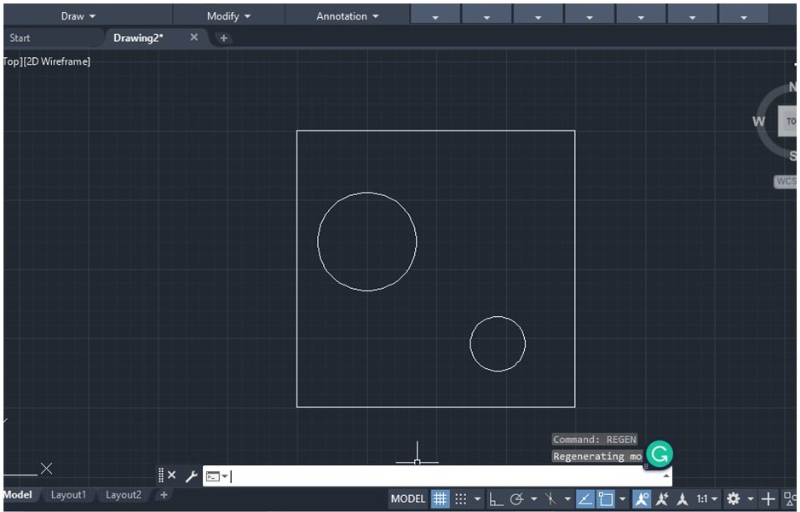
For example, to hide all hatches in the drawing above, first, enter “0” and press Enter.
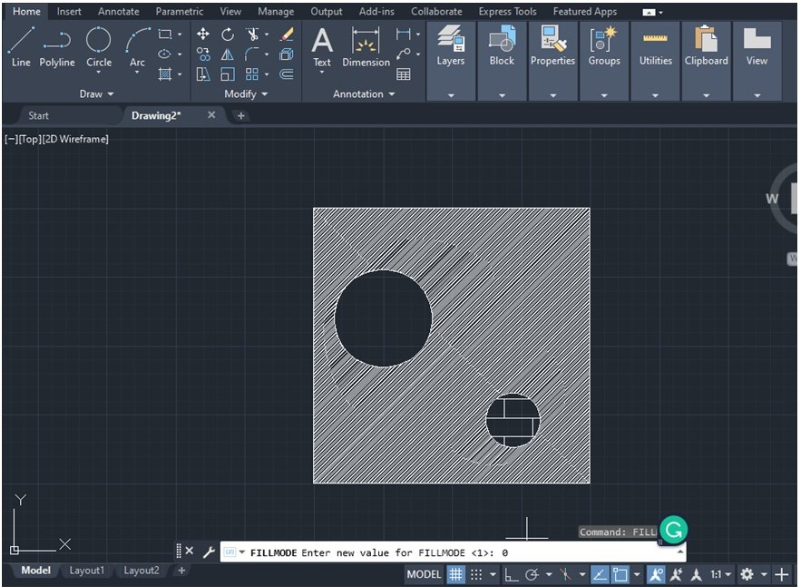
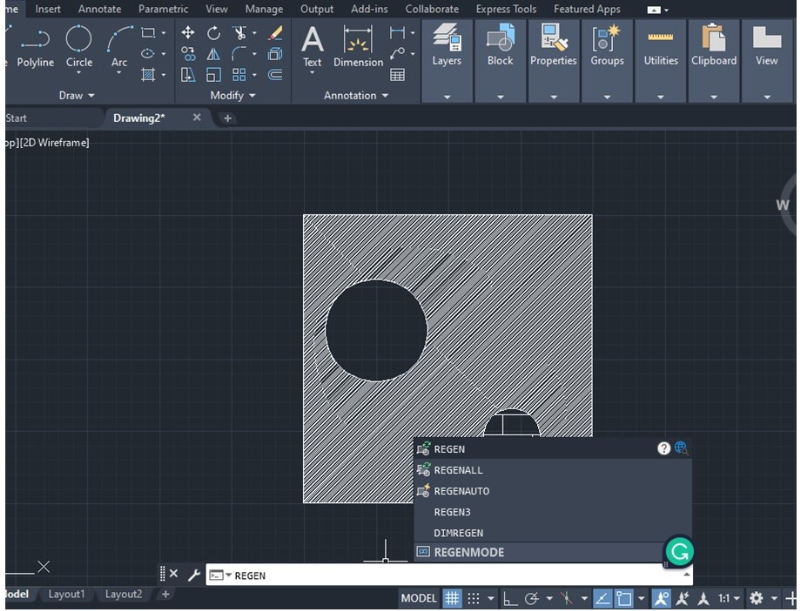
Next, type the word “REGEN” in the command bar and press Enter. All hatches should disappear as shown in the image below.
To reset all hatches (make them visible again), first type “FILLMODE” in the command bar and enter “1” as the new value. Then press Enter.
Next, type the word “REGEN” in the command bar and press Enter. All hatches should reappear.
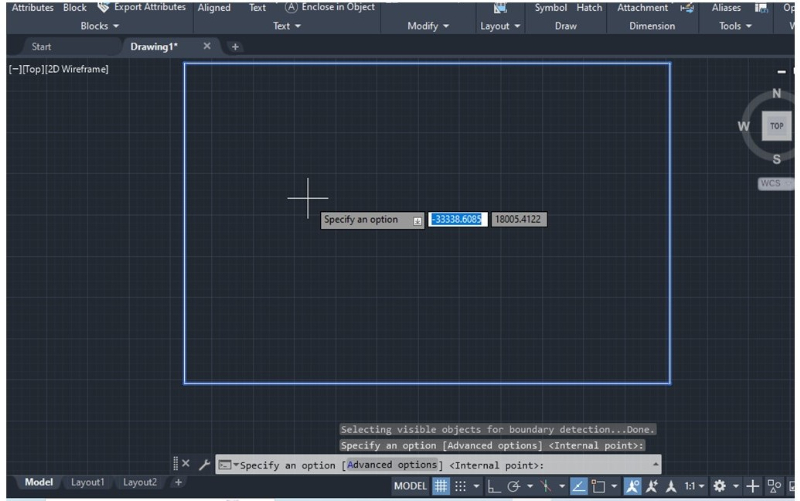
Applying Hatches to Open Areas in AutoCAD
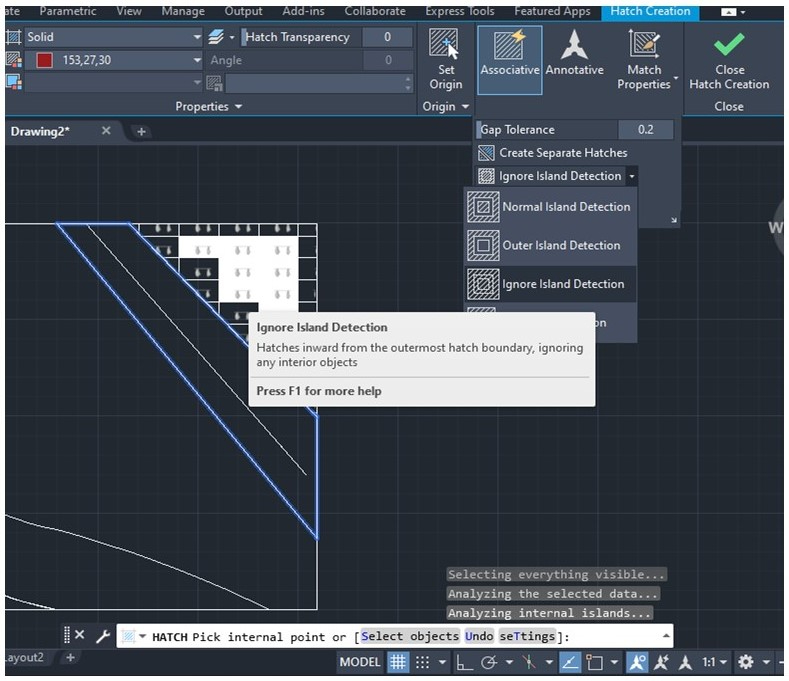
You can spend a lot of time trying to hatch areas in complex drawings or layouts with multiple lines, because by default hatching is only designed for closed objects. However, by changing the associative properties, you can hatch areas that aren’t completely closed.
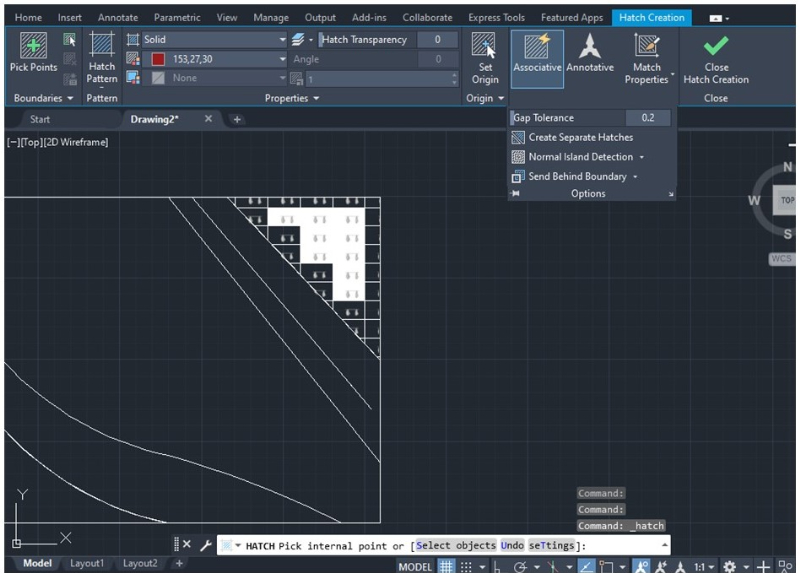
By default, AutoCAD should show a Gap Tolerance of “0” and a “Normal Island Detection”. If you click the down arrow on Normal Island Detection in the Hatch Creation tab, a menu will display with a set of options. Choose the “Ignore Island detection” to hatch areas that are not completely closed. Then press Enter.
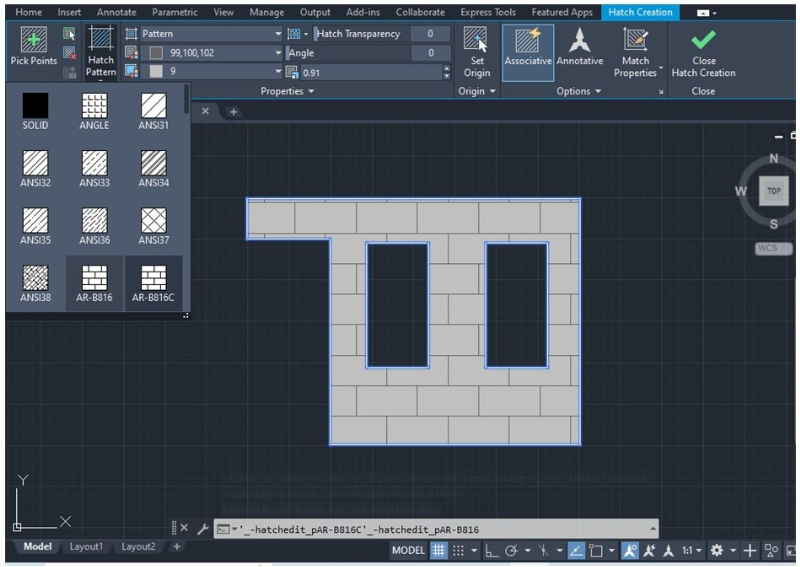
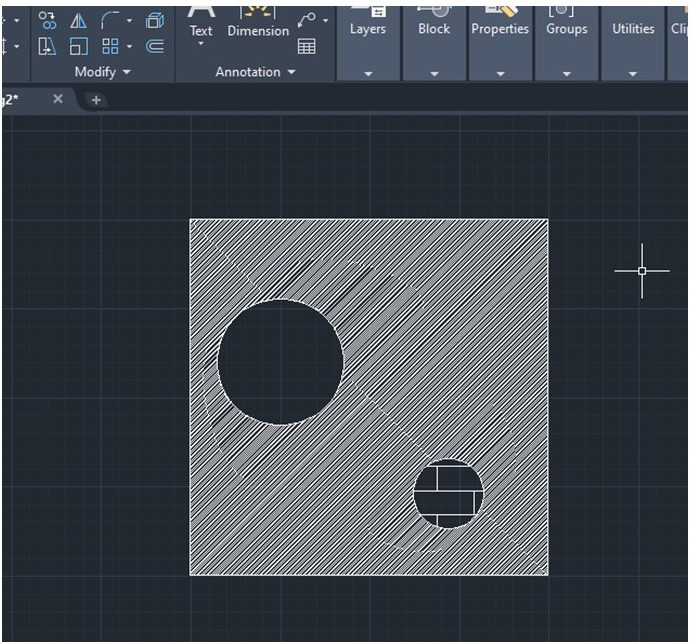
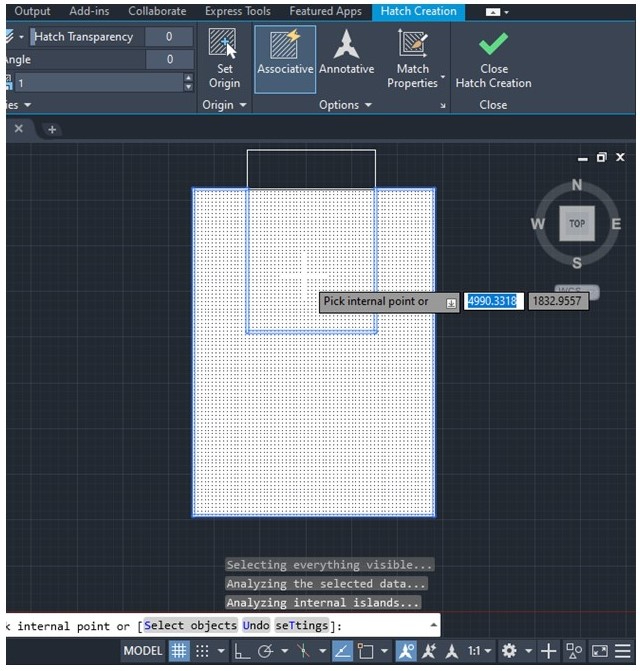
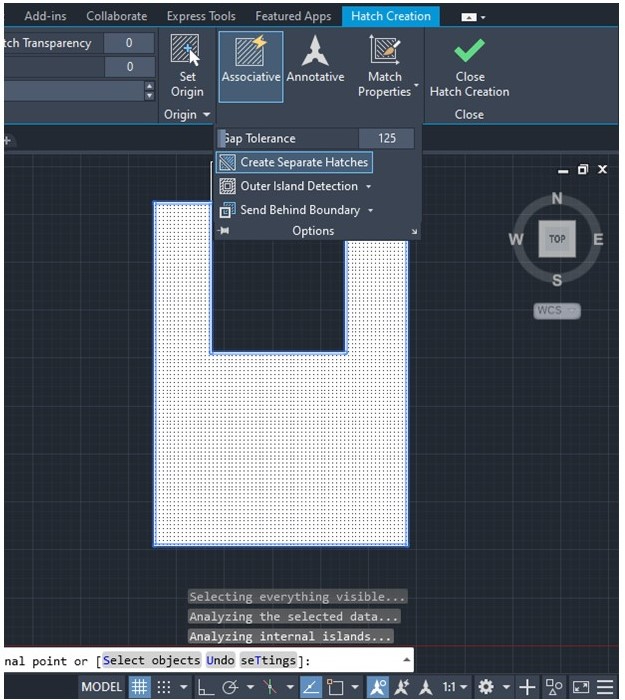
Separating hatches in connected areas in AutoCAD
An object can have multiple enclosed areas within itself, and applying hatching tools can become tricky, especially in figures like the one shown below.
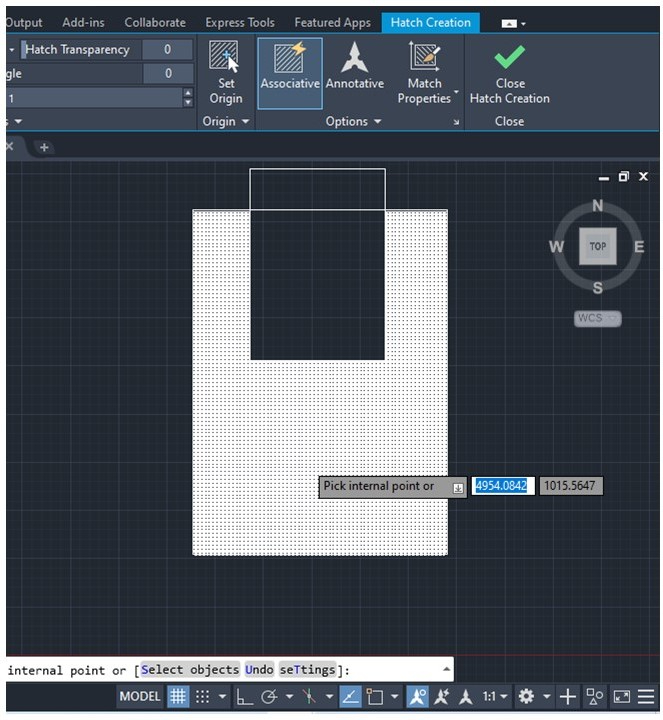
To create different hatches that share common lines or corners, select Create Separate Hatches located under the Hatch Creation tab.
You should be able to hatch each enclosed area individually by using the cursor and selecting an internal point.
Hatches are key visual features for simple and complex drawings, and learning how to use them appropriately can enhance your project’s quality and appearance. We hope this tutorial on managing, creating, hiding, and showing AutoCAD hatches has been useful.
For those interested in practical training in AutoCAD hatches and a range of other techniques, this online training course is a great place to start.