An easy to understand explanation of how to use Autodesk Fusion.
In this article, I’ll explain how to use Autodesk Fusion, a popular 3D CAD software program.
I’ve added diagrams to make it even easier to understand. Make sure you bookmark this article!
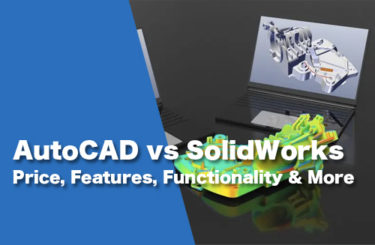
What is Autodesk Fusion?

There are various types of 3D CAD software available. Some can make realistic images of 3D models that you’ve created, while others can export created models into a format ready for 3D printing.
There are products which enable you to run simulations to test strength, or products which export files in a format for machine cutting. The prices and performance of these vary significantly.
To make the best use of the various features of 3D CAD software, you might think you have to install a lot of software! Don’t worry: Autodesk Fusion incorporates all of the above features!
It also reads the data of scanned objects and has a surface modelling workspace called “Sculpt.” It’s an ideal 3D CAD software program for both private and professional users.
Advantages of Autodesk Fusion
The main advantage of using Autodesk Fusion is that it is free to use for non-commercial purposes.
Anyone can use it as long as they have a computer and register for it.
As I mentioned earlier, there are many types of 3D CAD software, and high-performance 3D CAD software naturally tends to be very expensive.
I wanted to use the 3D CAD software which I had at work for myself at home too, but it was too expensive for a private user.
Then I found out that there is also a free version of Autodesk Fusion. I wasn’t expecting much to begin with, but I found it has more functions for a hobbyist than the software I used at work! There is a free version and a paid version. The paid version costs JPY7,560 JPY/month, so actually the initial expense for business use is quite small.
Another advantage of using Autodesk Fusion is that this is all you need to convert 3D models into a file format for 3D printing. It’s so convenient that you don’t need any other software for file conversion.
File management in Autodesk Fusion
You can save files created in Autodesk Fusion to the cloud.
You can create a folder called a Project, and you can organize and arrange files by creating Projects
You can also save “.f3d” files (the Autodesk Fusion save format) on your computer.
There are various file formats for uploading/exporting to other devices and these tend to be updated regularly, so make sure you check out the latest information online.
Autodesk Fusion is one of the best 3D CAD software programs for exchanging files with other devices with more ways of transferring data than many other 3D CAD software programs.
How to use Autodesk Fusion
Now I’ll explain how to use Autodesk Fusion with the help of diagrams.
The 3D modelling methods in Autodesk Fusion are as follows. I’ll tell you about each of them.
Surface modelling in the Patch workspace
To create a sketch using the sketch tool, you can do this in the Model workspace or the Patch workspace.
It might seem confusing to start with, but you’ll soon get the hang of it if you try it a few times for yourself.
To create a sketch, select the X, Y or Z plane to draw on.
Normally we choose a surface that’s easy to model, but you can choose whatever plane you like since there’s no real difference between the planes.
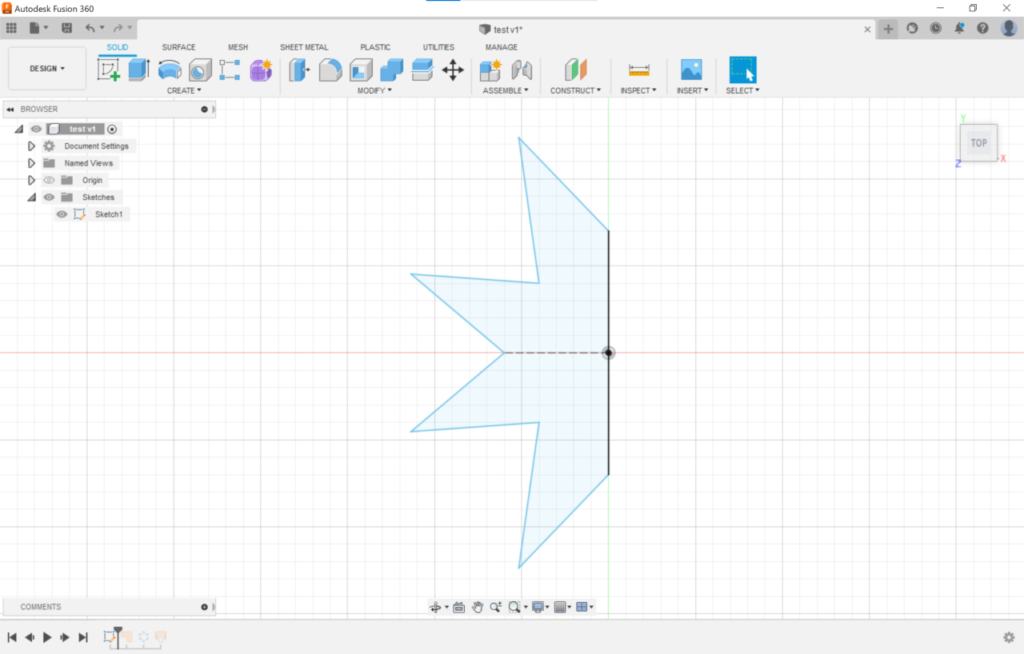
I made a sketch of the shape shown above.
The sketch tool draws lines that form the basis of 3D models.
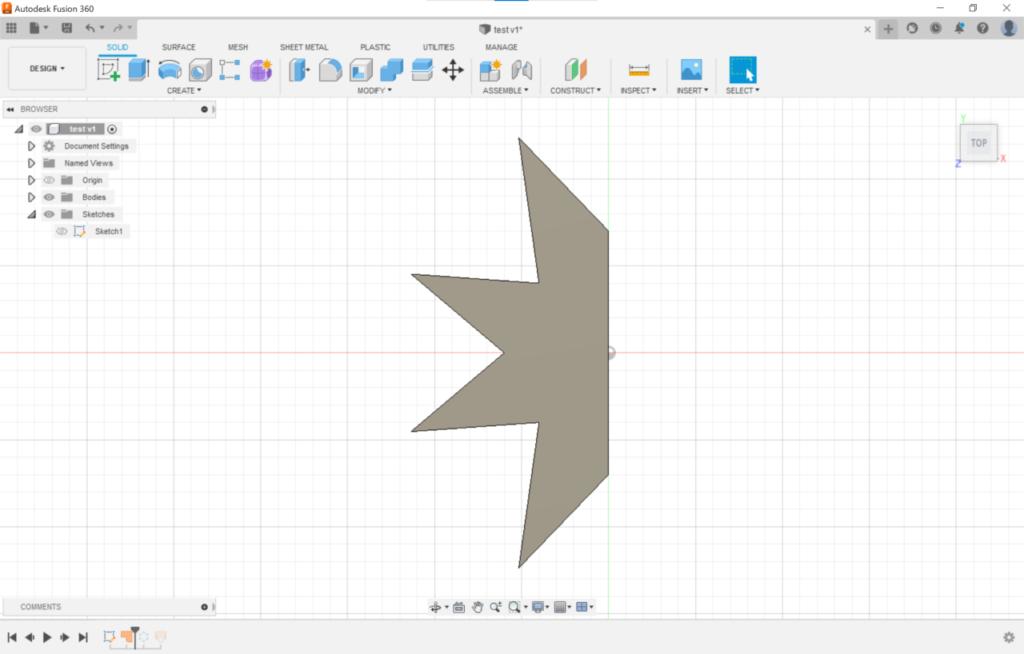
I’m going to play around with this simple 2D drawing and show you how to turn it into a 3D shape using different tools in Autodesk Fusion.
You can extrude or sweep the sketch in the Model workspace and make a surface model. It’s easy to imagine the resulting shape from this sketch, so I’m going to try a different modelling approach.
Change your workspace to the Patch workspace and select the Patch tool in the Create panel. Then select the created sketch. You’ll have a surface created from your drawing as shown above.
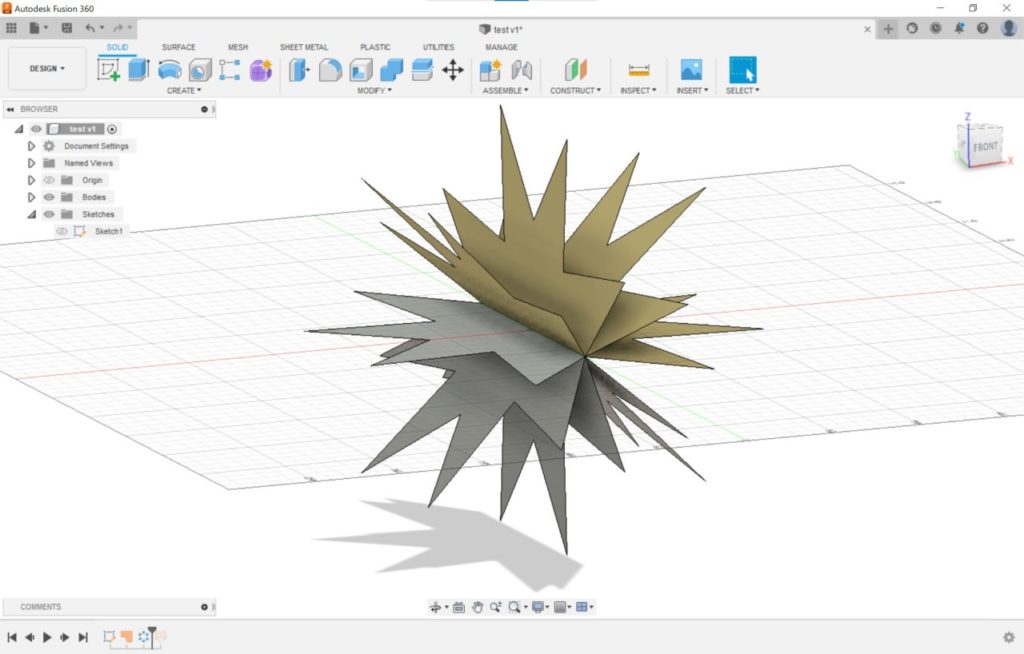
Out of curiosity, I copied and rotated the created surface.
I made eight copies and specified an angle of 45 degrees. The image above is the result of this.
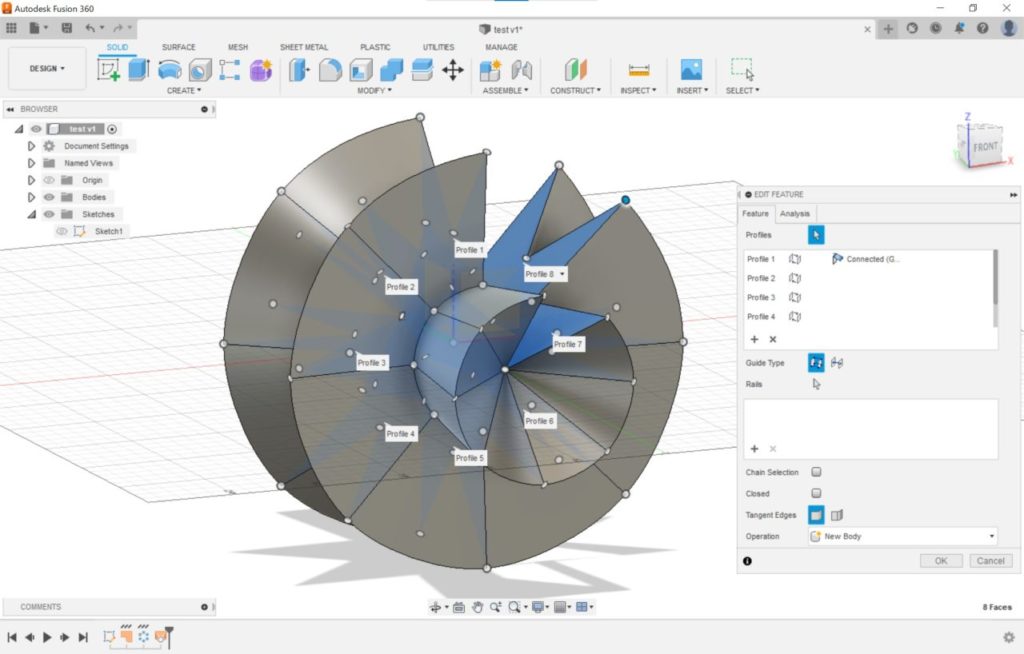
Then, I made a 3D model using the Loft tool to connect surfaces.
I made the shape partly open so that the cross-section is visible.
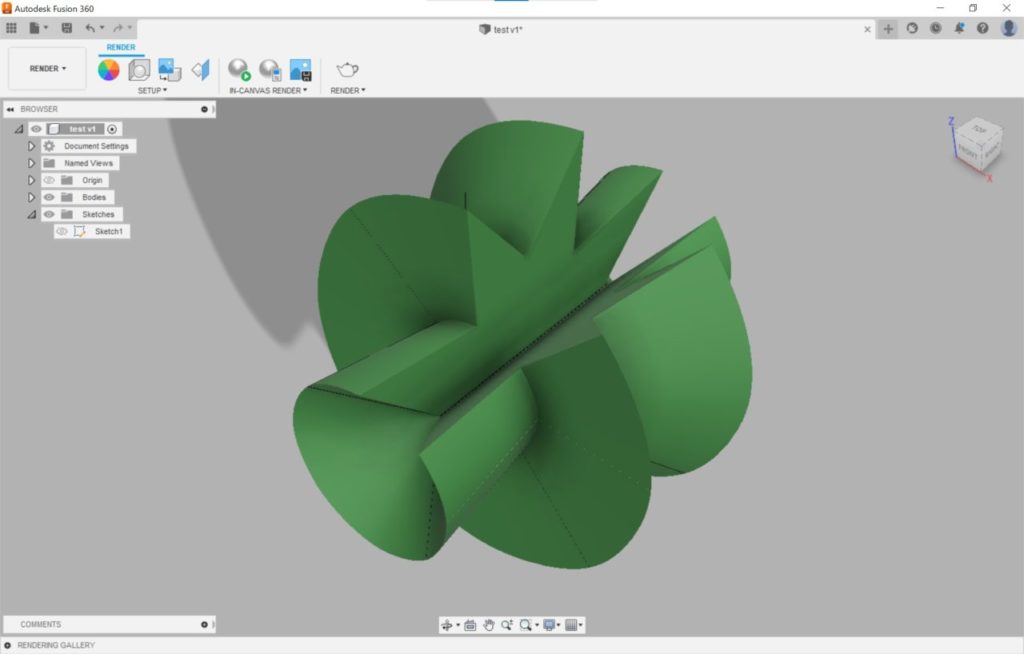
I gave the 3D model a green translucent plastic appearance.
To make this shape, I didn’t need the rotational copy, but I’ve shown it as an example of what can be done in Autodesk Fusion.
Surface modelling in the Sculpt workspace
Now we’re going to make a 3D model with the same sketch but using a different approach .
I use the Sculpt workspace which is suitable for creating streamlined shapes.
You can select the Sculpt workspace from the drop-down menu by clicking the “Design” workspace.
The models created in the Sculpt workspace are surface models, so we’re going to make another surface model here.
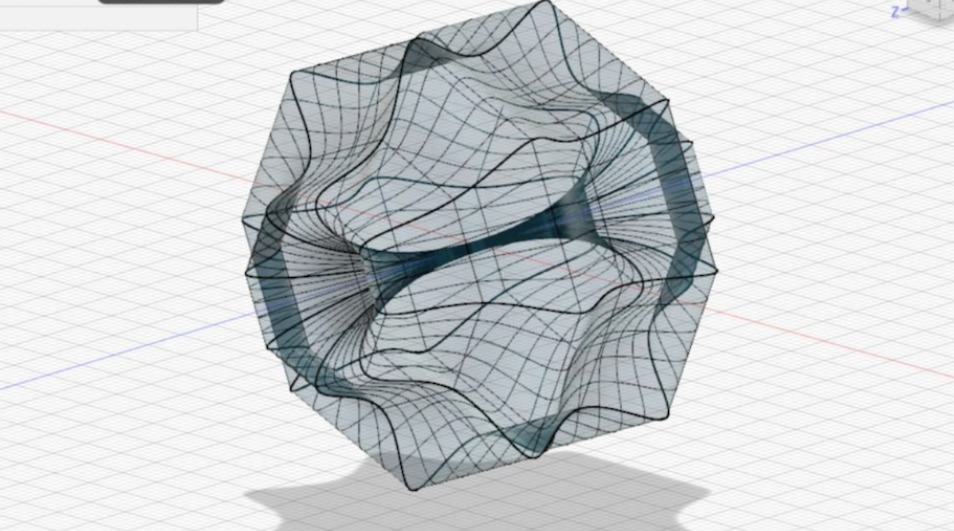
Let’s try the face command in the Create tool in the Sculpt workspace.
The face command can’t use a previously created sketch as it is, so you need to trace the sketch.
As a result, we get a unique surface. The resulting shape of the surface varies depending on the number of the surface divisions.
After connecting the surfaces with the Bridge command using the Modify tool, we get the unique 3D model shape shown above.
Rendering a solid model
The resulting shape turned out better than I expected, so I made it thicker to make it a solid model. Then I applied a material and rendered it with the appearance of colored glass.

Rendering is a feature which enables you to apply colors and materials to your model.
Displaying the shape and material of a product is very important when designing an industrial product, so I think it’s essential to have a very realistic rendering.
However, rendering takes time. The more complicated the shape and the more accurate the desired rendering is, the longer you have to wait. Not only this, your computer may freeze depending on its specifications.
In Autodesk Fusion, rendering can also be done in the cloud, which is much faster than on a computer.
However, you need to be selective when using cloud rendering, since you’ll be charged for any shortfall if you run out of Cloud Credits during the process.
If you need a little extra help…
You might find the layout of the tools or the procedures in Autodesk Fusion a bit confusing. You’ll get accustomed to this the more you use it. This is true of many 3D CAD software programs, but sometimes you need some extra help.
When I have a problem, I usually watch videos which show similar shapes to the ones I want to make and browse information in online articles to find out about using commands.
If you can’t find what you want to know by searching, you can learn it from a course.
This course is aimed at beginners and it’s ideal if you want to learn 3D CAD from scratch.
Summary
As I’ve explained, Autodesk Fusion is a good-value 3D CAD software which is great for 3D modelling for both individual users and professionals. I recommend this software to anyone who wants to use 3D modelling in their work, or who wants to create original items with a 3D printer, or who just wants to play around with 3D CAD software.
Read this article to master Autodesk Fusion!