In the world of digital drafting, AutoCAD stands out as a tool for innovation. It simplifies the creation of accurate and detailed drawings for architects, engineers, and designers. One of its key features, the use of AutoCAD blocks, proves incredibly helpful. These blocks facilitate the reuse of common design elements across various projects, smoothing and speeding up the design process. This efficiency demands less from your hardware. This article delves into AutoCAD blocks, focusing on their creation, management, and usage.
Understanding AutoCAD Blocks
First off, it’s important to know exactly what is a block and how to use them. Let’s start from the beginning.
Definition and Concept of Blocks in AutoCAD
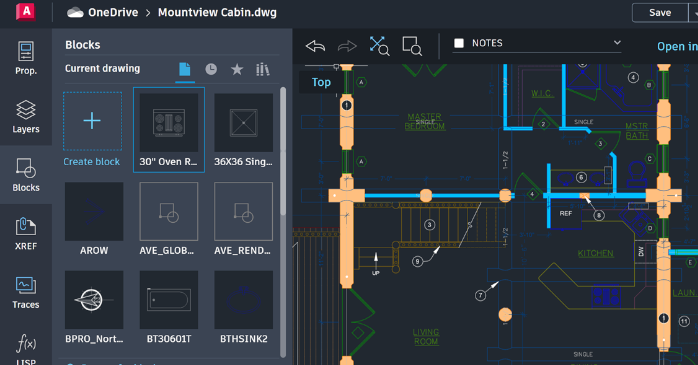
AutoCAD blocks streamline the design process by combining one or more objects into a single, named unit. These blocks can range from simple objects, like door handles, to more complex ones, like machinery, tailored to the specific needs of a project. By creating a block, designers can insert the same set of objects into their drawings multiple times without needing to redraw them each time. This process not only saves a significant amount of time but also ensures design consistency throughout.
Types of Blocks
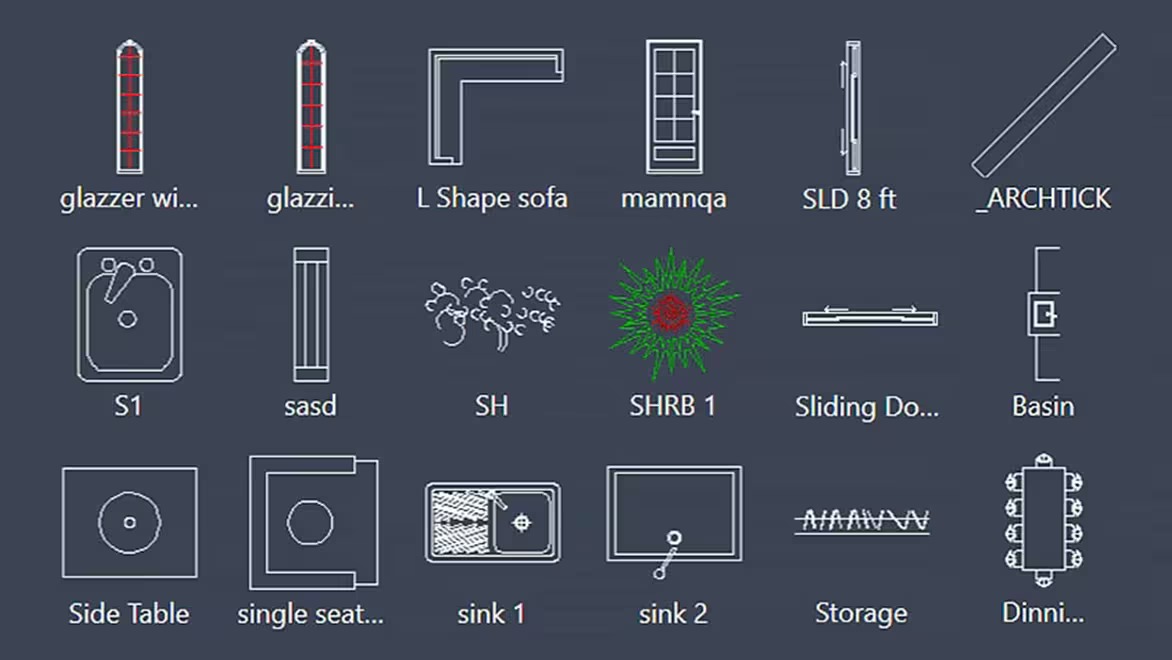
Blocks in AutoCAD serve various purposes and come in different forms:
- Simple Blocks: Ideal for repeated elements that do not change, such as furniture or fixtures.
- Complex Blocks: Comprising multiple components, these blocks enhance drawings without complicating the design process.
- Dynamic Blocks: Allow users to modify their geometry or attributes within a drawing, offering unparalleled flexibility.
- Annotated Blocks: Designed for scalability, they adjust their size or notation automatically, maintaining legibility across different drawing scales.
Advantages of Using Blocks
Using blocks in AutoCAD projects offers numerous advantages:
- Efficiency: Significantly reduces the time required to draw and redesign common elements.
- Consistency: Maintains uniformity in design elements, crucial for professional standards.
- Reduced File Size: Minimizes file sizes by referencing the same block data, enhancing software performance.
Creating and Managing AutoCAD Blocks
Now we will go step-by-step through the process of creating and managing your blocks. Creating an AutoCAD block is a straightforward process that can significantly enhance your drafting workflow. Here’s how to do it:
- Selection: Begin by selecting the objects you want to combine into a block. This could be anything from a simple set of lines to a complex assembly of various shapes and text.
- Define the Block: Use the BLOCK command to open the Block Definition dialog box. Here, you will give your block a name and define other properties, such as picking a base point, which determines where the block will be placed when inserted into other drawings.
- Specify Block Properties: Choose whether you will explode the block upon insertion, or if you will retain its block status. You can also add a description for future reference.
- Completion: Once all details are specified, complete the block creation. The selected objects are now a single block entity that can be inserted multiple times across your drawings.
Editing and Modifying Blocks
Blocks are not set in stone; you can edit and modify them to suit changing requirements:
- To modify a block, use the BEDIT (Block Editor) command. This opens a specialized environment where you can make changes to the block without affecting its instances in the drawing.
- Changes you make in the Block Editor are applied to all instances of the block, ensuring consistency across your project.
Strategies for Organizing and Managing Block Libraries
An organized block library is key to a streamlined workflow:
- Categorization: Organize your blocks into categories based on their use case, such as electrical symbols, furniture, or landscaping elements.
- Naming Conventions: Adopt a clear and consistent naming convention for your blocks to make them easily identifiable.
- Storage: Use cloud storage or a shared network location for your block libraries to ensure they are accessible to all team members.
Renaming Blocks
Renaming blocks in AutoCAD is an essential task for maintaining an organized and efficient block library. As projects evolve, the need to rename blocks for clarity, consistency, or to align with updated naming conventions may arise. Here’s how you can effectively rename blocks within your AutoCAD drawings:
- Access the Rename Dialog: Use the RENAME command to open the Rename dialog box. This utility allows you to rename various named objects within AutoCAD, not just blocks.
- Selecting Block to Rename: In the Rename dialog, select “Blocks” from the list of object types. This filters the list to show only the block definitions in the current drawing.
- Renaming Process: Scroll through the list or use the search function to find the block you wish to rename. Select it, and then type the new name in the designated field. It’s important to follow any specific naming conventions your project or company adheres to for consistency and ease of use.
- Completing the Renaming: Once you have entered the new name, click “OK” or “Rename” to apply the changes. The changes will immediately rename the block in the block library and will reflect the new name in all instances throughout the drawing.
- Updating Block References: After renaming a block, ensure that all references to the old block name are updated in your documentation, schedules, and legends to maintain accuracy in your project.
Making Title Blocks in AutoCAD
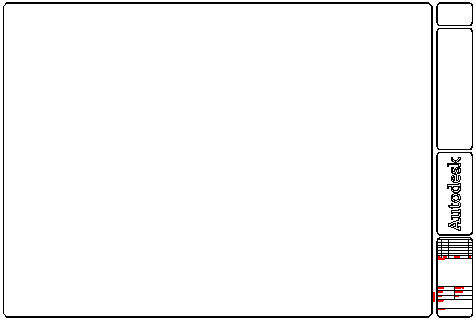
Title blocks are an integral part of technical drawings, providing essential information like the project name, author, date, scale, and revision history. Creating a custom title block in AutoCAD can standardize your documentation and enhance professional presentation. Here’s a guide to making title blocks:
- Design the Layout: Start by sketching out the layout of your title block, including the placement of text fields, logos, and any other relevant information. Consider the standard paper sizes (A4, A3, etc.) your drawings will be printed on.
- Draw the Title Block: In a new or existing drawing, use AutoCAD’s drawing tools (lines, rectangles, text) to create the border and internal divisions of your title block. Use layers to manage different elements effectively, such as borders, text, and logos.
- Add Attributes for Dynamic Text: Instead of static text, use attributes (ATTDEF command) for information that changes from drawing to drawing, such as the drawing title, number, and revision. Attributes act as placeholders that prompt the user to enter specific information when the title block is inserted into a new drawing.
- Convert to Block: Once your title block design is complete, select all the elements and use the BLOCK command to define it as a block. Assign a base point that makes sense for insertion, typically the bottom-left corner.
- Insertion into Drawings: Save your title block as a separate drawing or part of a block library for easy insertion into new projects. When inserting, fill out the attribute information as prompted to customize the title block for each project.
- Updating and Reusing: If you need to update the title block, use the BEDIT command to make changes. This ensures your title block remains relevant and accurate for all projects.
Advanced Techniques with Blocks
Here are somethings to keep in mind once you get moving…
Using Dynamic Blocks
Dynamic blocks are a game-changer in AutoCAD, offering flexibility and functionality beyond static blocks. They allow users to modify the block’s shape, size, or orientation after insertion, without the need for multiple block definitions. For example, you can stretch a window block to various widths or equip it with different opening styles, all within a single block definition.
Incorporating Attributes in Blocks
Within AutoCAD blocks, you can include attributes to hold extra information like manufacturer details, part numbers, or other important data related to the block’s elements. You can pull this added data out to form bills of materials, schedules, or legends straight from your AutoCAD designs, making the documentation and reporting tasks much more straightforward and efficient.
Tips for Optimizing Block Performance
- Purge Unused Blocks: Regularly use the PURGE command to remove unused block definitions from your drawing to keep file sizes down and improve performance.
- Simplify Block Design: While it’s tempting to include a high level of detail in blocks, consider the impact on performance and opt for simplicity where possible, especially for blocks that will be used extensively throughout a drawing.
Best Practices and Common Pitfalls
- Best Practices include keeping your block library updated and well-organized, and using layer standards within blocks to ensure they integrate seamlessly into various drawings.
- Common Pitfalls include over complicating blocks with unnecessary detail that can bloat file sizes and reduce performance. Another is failing to standardize block attributes, leading to inconsistent data across drawings.
Conclusion
AutoCAD blocks offer a valuable advantage, greatly improving design speed and precision when used wisely. By building a detailed block library and making the most of dynamic blocks and their attributes, you can fully tap into the potential of AutoCAD blocks. The techniques shared in this article will help you get the most out of these features. Whether you’re new to this and seeking to make your design process more efficient, or you’re a seasoned expert aiming to refine your work further, becoming skilled in using AutoCAD blocks is a crucial move towards better productivity and higher quality in your CAD projects.
For more information check out brush up on our primer on scale factors.