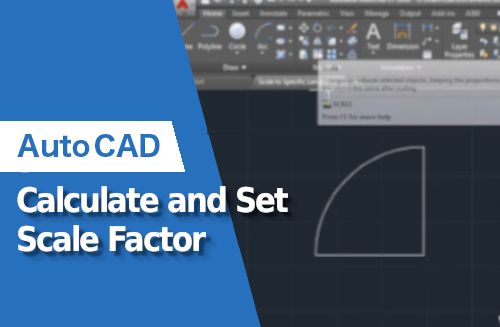
When using AutoCAD the scale factor is crucial to ensure a drawing’s fit on a specified sheet size or adjusting the size of an imported object to align with the scale of the current drawing. Scale factor is the command to adjust the size of objects or drawings. In this article, we’ll be looking at ways to determine the scale factor and how to change the scale factor of objects to fit your desired size.
- 1 Formula for Scaling
- 2 Steps to Use Scale Factor in AutoCAD
- 3 Tips for Effective Scaling
- 4 Charts for reference:
- 5 Common Issues and Troubleshooting
- 6 Scaling an Object to Match Another Using Reference Points
- 6.1 Step 1: Select the Object to Scale
- 6.2 Step 2: Specify the Base Point
- 6.3 Step 3: Select the First Reference Point
- 6.4 Step 4: Select the Second Reference Point
- 6.5 Step 5: Specify the New Length
- 6.6 Step 6: Verify the Scaling
- 6.7 Tips for Scaling
- 6.8 Common Mistakes and How to Avoid Them in AutoCAD Scaling
- 7 Advanced Tips
- 8 Conclusion
Formula for Scaling
Scale Factor=Desired Size/Original Size
Explanation
- Original Size: This is the current size of the object or dimension in your drawing. It can be a length, width, height, or any measurable attribute of the object.
- Desired Size: This is the size you want the object or dimension to be after scaling.
- Scale Factor: This is the numerical value that you will use to scale the object in AutoCAD.
- If the scale factor is greater than 1, the object will increase in size.
- If the scale factor is less than 1 (but greater than 0), the object will decrease in size.
- If the scale factor is exactly 1, the object will remain its original size, of course. Ideally, your files should be on a 1:1 reference scale. Its industry standard and much easier for anyone who has to work with your files.
Example

Suppose you have a line that is 50 units long (Original Size), and you want it to be 100 units long (Desired Size). The scale factor would be calculated as follows:
scale factor = 100 units (desired size) 50 units (original size) = 2
So, you would use a scale factor of 2 to scale the line to your desired length in AutoCAD.
This formula applies to uniform scaling where all dimensions (length, width, height) of an object are scaled by the same factor. For non-uniform scaling (different scale factors for different dimensions), you would apply this formula independently for each dimension.
Steps to Use Scale Factor in AutoCAD
Step 1: Select the Object(s) to Scale
Click on the object or multiple objects you intend to scale. For multiple selections, hold the “Shift” key while clicking each object.
Step 2: Accessing the Scale Command
The scale command can be accessed either by typing SCALE in the command line and pressing Enter, or by locating the Scale tool in the Modify panel on the Home tab.
Step 3: Specify the Base Point
After activating the scale command, specify a base point. This serves as a pivot point for scaling. Select a point on the drawing to set this base point.
Step 4: Entering the Scale Factor
Enter the scale factor next. A scale factor of 2, for instance, will double the object’s size, while 0.5 will halve it. Input this factor via the command line or visually scale the object using your mouse and click to finalize the new size.
Step 5: Review and Adjust if Necessary
Inspect the scaled object(s). If the scale isn’t satisfactory, (CTRL + Z) and redo the process with a different factor.
Tips for Effective Scaling
- Understand Units: Grasping the units in your drawing aids in determining the correct scale factor.
- Use Reference Objects: Employ a known-sized reference object for uncertain scale factors.
- Keep Proportions: The scale command normally maintains object proportions. Use the stretch command for proportion alterations.
Charts for reference:
Architectural Scales
| DRAWING SCALE | SCALE FACTOR | Viewport
Scale |
Decimal
Scale |
| 1/16″ = 1′-0″ | 192 | 1/192xp | .0625″ = 1′-0″ |
| 3/32″ = 1′-0″ | 128 | 1/128xp | .09375″ = 1′-0″ |
| 1/8″ = 1′-0″ | 96 | 1/96xp | .125″ = 1′-0″ |
| 3/16″ = 1′-0″ | 64 | 1/64xp | .1875″ = 1′-0″ |
| 1/4″ = 1′-0″ | 48 | 1/48xp | .25″ = 1′-0″ |
| 3/8″ = 1′-0″ | 32 | 1/32xp | .375″ = 1′-0″ |
| 1/2″ = 1′-0″ | 24 | 1/24xp | .50″ = 1′-0″ |
| 3/4″ = 1′-0″ | 16 | 1/16xp | .75″ = 1′-0″ |
| 1″ = 1′-0″ | 12 | 1/12xp | 1″ = 1′-0″ |
| 1 1/2″ = 1′-0″ | 8 | 1/8xp | 1.5″ = 1′-0″ |
| 3″ = 1′-0″ | 4 | 1/4xp | 3″ = 1′-0″ |
Engineering Scales
| DRAWING SCALE | SCALE FACTOR | VIEWPORT SCALE |
| 1″ = 10′-0″ | 120 | 1/120xp |
| 1″ = 20′-0″ | 240 | 1/240xp |
| 1″ = 30′-0″ | 360 | 1/360xp |
| 1″ = 40′-0″ | 480 | 1/480xp |
| 1″ = 50′-0″ | 600 | 1/600xp |
| 1″= 60′-0″ | 720 | 1/720xp |
| 1″ = 70′-0″ | 840 | 1/840xp |
| 1″ = 80′-0″ | 960 | 1/960xp |
| 1″ = 90′-0″ | 1080 | 1/1080xp |
| 1″ = 100′-0″ | 1200 | 1/1200xp |
Common Issues and Troubleshooting
- Objects Disappear: Extreme scale factors can cause objects to vanish or overly enlarge. Undo and retry with a moderate factor.
- Non-Uniform Scaling: For scaling in varied directions, utilize the non-uniform scaling option.
Scaling an Object to Match Another Using Reference Points
Step 1: Select the Object to Scale
Activate the SCALE command by typing SCALE in the command line and pressing Enter. Then, select the object for scaling.
Step 2: Specify the Base Point
Choose a fixed base point on your object for scaling, ideally aligning with a specific part of the target object.
Step 3: Select the First Reference Point
Pick a reference point on your object, acting as the first point of the measuring line for scaling.
Step 4: Select the Second Reference Point
Choose the second reference point on your object, determining the original length for AutoCAD’s scaling calculation.
Step 5: Specify the New Length
Input the new length directly or click on your target object to set this length.
Step 6: Verify the Scaling
Use the MEASUREGEOM command to confirm the scaled object’s size matches the intended dimension.
Example: To scale a rectangle (Object A) to match another (Object B), follow the steps of selecting, specifying base points, and setting the new length according to Object B’s dimensions.
Tips for Scaling
- Alignment Matters: Select reference points that align easily with the target object.
- Use Object Snaps: This assists in selecting precise points on objects.
This two-point pivot method for scaling allows intuitive size matching of objects without manual scale factor calculations.
Common Mistakes and How to Avoid Them in AutoCAD Scaling
Understanding these common mistakes and knowing how to avoid them can save time and improve the accuracy of your drawings:
Incorrect Unit Conversion:
- Mistake: A frequent error is not converting units correctly, leading to a mismatch between the intended and actual sizes.
- Avoidance: Always double-check the unit settings in both your current drawing and any imported elements. Ensure consistency in unit types (e.g., millimeters, inches) across all elements of your drawing.
Misinterpreting Scale Factors:
- Mistake: Misunderstanding how scale factors work, such as assuming a scale factor of 2 will halve the size, instead of doubling it.
- Avoidance: Remember that a scale factor greater than 1 increases size, while a factor less than 1 but greater than 0 decreases it. Test the scale factor on a non-critical object first if unsure.
Scaling Objects Individually Instead of as a Group:
- Mistake: Scaling objects individually can lead to misalignment and inconsistency, especially in complex drawings.
- Avoidance: When appropriate, select and scale multiple objects as a group. This maintains their relative positions and proportions.
Ignoring Annotation Scale:
- Mistake: Forgetting to adjust the scale of annotations, texts, and dimensions, which can become unreadable after scaling.
- Avoidance: Use the annotation scale feature to ensure that texts and dimensions are automatically adjusted to suit the scale of the viewport.
Neglecting Reference Points:
- Mistake: Choosing an inappropriate reference point can lead to objects being scaled in an unintended way.
- Avoidance: Select a reference point that makes sense for the desired scaling transformation. The reference point acts as a pivot point around which the object scales.
Overlooking Block Attributes:
- Mistake: Scaling blocks without considering the scaling of block attributes, resulting in disproportionate or misaligned attributes.
- Avoidance: Check the ‘Uniform Scale’ option when scaling blocks and use the ATTSYNC command post-scaling to adjust attributes if necessary.
Improper Use of Non-Uniform Scaling:
- Mistake: Applying non-uniform scaling without considering the impact on the object’s proportions and interrelationships.
- Avoidance: Use non-uniform scaling judiciously, especially when dealing with mechanical parts or architectural elements where maintaining proportion is crucial.
Advanced Tips

Custom Scale Factors for Annotations and Text:
- When dealing with annotations, text, and dimensions, consider setting a different scale factor to maintain legibility. AutoCAD allows you to apply a separate scale for these elements which can be adjusted independently from the main drawing scale.
Automating Scaling with Scripts and LISP Routines:
- For repetitive scaling tasks, consider automating the process using AutoCAD’s scripting capabilities or LISP routines. This can save time and reduce errors in large projects.
- Create custom scripts to handle routine scaling operations, especially when working with standardized drawing formats or repetitive design elements.
Non-Uniform Scaling for Design Flexibility:
- Explore non-uniform scaling for creative design needs. This technique allows you to scale objects differently in the X, Y, and Z directions, offering a greater degree of control for complex shapes and designs.
- This can be particularly useful in architectural or mechanical designs where asymmetrical scaling is required.
Integration with External Data and Models:
- When importing data or models from other software, use the scale factor to align the imported elements with your current drawing’s scale. This is crucial for maintaining accuracy in mixed-software environments.
- Pay attention to unit discrepancies when importing, and use scaling to correct any mismatches.
Experimenting with Dynamic Blocks for Scalable Designs:
- Utilize dynamic blocks which can be scaled without losing their proportions or functionalities. This can be particularly useful for components that need to be used at various sizes within the same project.
Scale Factor in 3D Modeling:
- In 3D modeling within AutoCAD, understanding and applying scale factors can be crucial for rendering and 3D printing. Ensure that the scale in your virtual model matches the real-world dimensions required for production.
Conclusion
In conclusion, mastering the use of the scale factor in AutoCAD is an invaluable skill for any designer or engineer. This article has provided a comprehensive guide on how to calculate and set the scale factor in AutoCAD, ensuring precision and efficiency in your work. We explored the fundamental formula for scaling, which is the ratio of the desired size to the original size, and detailed steps for applying this formula in AutoCAD. From selecting the objects to scaling, specifying base points, and entering the scale factor, each step is crucial for accurate scaling. Whether you’re working on a small component or a large architectural plan, the ability to correctly scale objects is key to creating drawings that are accurate and visually consistent with real-world dimensions. Remember, practice and patience are essential on your AutoCAD journey. By honing these skills, you’ll ensure that your designs are not only precise but also practical and in line with industry standards.